Spirometry Testing Explained

Passing Grades Required
>No less than 80.0% FEV1[L]- What does it really mean?
>As & Bs vs. Cs & Ds referring to the overall "session quality" of your test.
What Is It?
So what exactly is the spirometry test and why is it so important to repeat it each year? In short; the spirometry test utilizes a person’s age, ethnicity, gender, height, and weight to predict their lung capacity. That means that part of your grade is based on comparing your performance to data showing how well other people have done. Predict is the keyword because an abnormal performance doesn't necessarily mean that something is wrong with the person taking the test. It could be that they're unique compared to others or that they just need to understand the goals of the test in order to perform better.
What Does It Look Like?
We start by entering a person’s information so that the device can set the pass-fail standards for that individual. Once the device is ready the patient can start their test trials.
A trial is performed by inhaling deeply, inserting the tube into your mouth, and then forcefully exhaling the air in your lungs through the tube and sustaining that exhaled breath until the test has stopped. This can be an uncomfortable sensation when there is no resistance on the other end and can leave someone feeling like there is nothing left to push out. Even then, we still ask you to keep blowing and squeezing your core to ensure the test isn’t stopped too soon. We do this because the device is sensitive enough that, even if you don’t feel like you’re moving air through the tube, it could still be picking up enough airflow to register during the trial.
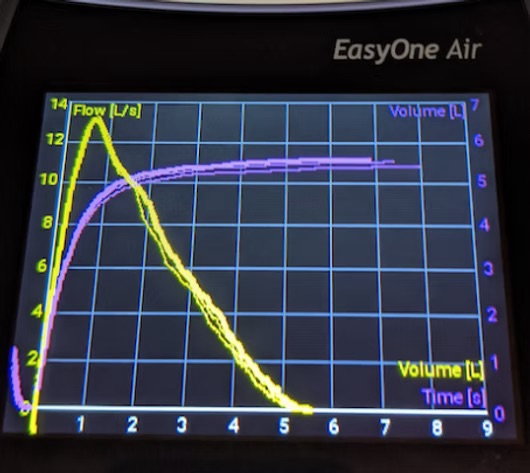
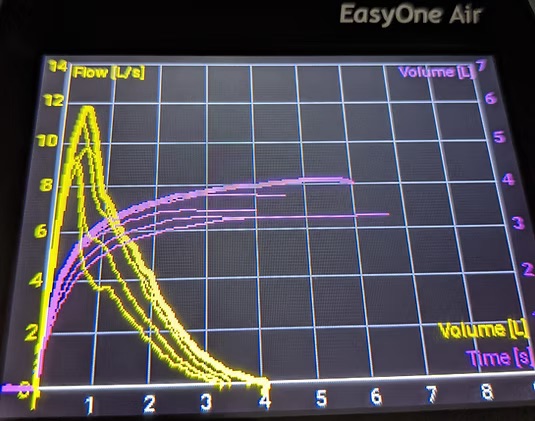
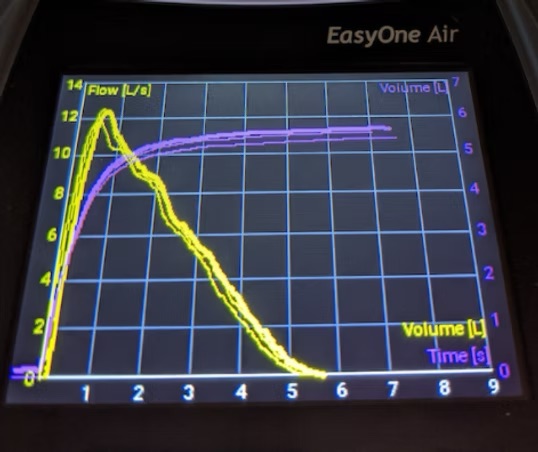
What Do the Graphs Mean?
When we perform the test we see two graphs. Yellow and Purple.
- The Yellow line represents the “Air FLOW” of your breath when you forcefully exhale. The shape will show the "rate" or "speed" of air going through the tube and will spike higher or lower based on the amount of force you put into each trial. The peak of the yellow line is your PEF[L/s] score which is the "Peak Expiratory Flow" measured as liters per second.
- The Purple line represents the “Air VOLUME” and is related to the FEV1[L] score that needs to meet a minimum standard of 80.0%. The "Forced Expiratory Volume in 1 second" is the volume of air that you can exhale in the very first second of the test. This is directly affected by how big of a breath you take in before you push out to start the trial.
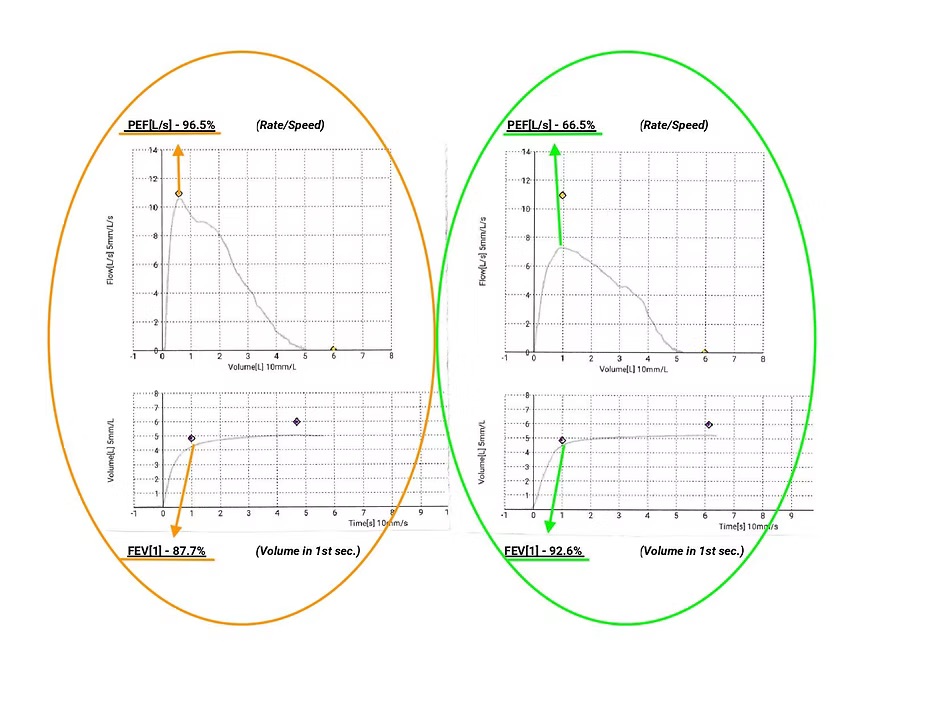
Note: Taking a shallow breath or starting the trial before you've filled your lungs to their maximum capacity will directly impact the FEV1[L] score. Using an extremely forceful breath (spiking the yellow line) doesn't necessarily mean the volume measurement (purple line at 1 second) will increase in the same way. Below are my own personal examples. The left image shows a breath that reached 97% FLOW rate with 88% VOLUME at the 1-second mark. The right image shows a different breath where I only used a 67% FLOW rate to get a 93% VOLUME score.
What Do the Letter Grades "A", "B", "C", "D" Mean?
Everyone who takes the test is required to perform a minimum of THREE trials to officially pass with an acceptable letter grade. Even if you did a perfect first trial you would be required to do at least three total to achieve the "A" or "B" score needed. This letter grade refers to the person’s ability to repeat the breath consistently. For example: if you did three perfect "A" tests in a row; the first test would be the baseline and would show a session quality of “D”. The second test would show a session quality of “C” because the device can compare it to the first one. The third perfect test would be the first time you’d ever see the actual “A” letter grade. So, make sure you don’t think of these letter grades the same way you would with a school test. If you keep changing your technique because you think it’ll make the letter grade better, you’ll actually be moving away from the "A" or "B" grade because each breath is unique and inconsistent.
Note: Many people will perform more than three breaths to pass the test. They might perform four tests if the first three are too unique, however, a fourth test might come back as an “A” or “B” if it’s consistent enough with any of the previous trials. This idea can continue for 5, 6, 7+ test trials depending on a person’s ability to be consistent. The "consistency" is nothing more than comparing how close each test's FLOW and VOLUME measurements are to each other.